Showing posts with label diy. Show all posts

Saturday, December 3, 2016

Dollar Store Christmas Tree Revamp


Well, it's official. I have an addiction to Dollar Tree. It's palpable. It's outrageous. It's a wonder of wonders.

Can you believe I've been putting up my own Christmas Tree for about seven years and never invested in a tree skirt? Who am I? This is uncivilized behavior.

2016 may be the worst year known to man but I will not let it go down without a TREE SKIRT!

After my cheap self refused the double digits of Cyber-Monday-tree-skirt-browsing, I succumbed to the Almighty Tree of Dollar for a felt skirt that was.... fine. At best. Still better than the oddly wrapped plush throws of yesteryear.

One stop to the Dollar Spot at Target and voila! A sensible tree skirt makeover was born!


I encourage you to go through whatever little crafty trinkets you have. I found some rhinestones, pearl appliques, puffy paint, glitter string, jingle bells. Target had pom-poms and trim, each for a buck. And the hot glue gun is your friend. Go to town. Let the creativity take over. 

And BAM. Your Christmas tree looks a little fancier and you feel a little jollier.


Share your frugal Christmas revamps with me right here! I'm always excited to embrace the simple and give it a little extra shine. :)

Linking Up With:


Monday, November 21, 2016

Operation Cardboard Christmas


Well, holy macaroni! It's only been almost TWO years. But, I'm back. With a vengeance. Ready to reunite myself and all of you fine people with the wonderful world of DIY and organization and deliciousness and frugality! :)

A mindless flick of the finger through the Pinterest abyss can land you in a pretty creative mindset. Mine? The Cardboard Fireplace. 

Afforable? The cheapest.

Tacky? Certainly.

Childish? Maybe. 

Cute? SOOO cute.

As we have just celebrated a few monumental birthdays and anniversaries and general healing over the past couple of months, not to mention our discovery of Amazon Prime Now (Dear Lord, help us all. We'll never leave the house again), we have acquired quite a mountain of cardboard boxes and scraps. Typically, this will go right to the recycling bin. But, as I began to envision the possibilities for a cozy Christmas in a Florida apartment, I thought to myself, "Maybeeeee. Just maybe...."


And voila. The improvised construction began. I bought a few "My 1st Project Boards" from Wal-Mart at ninety-nine cents a pop, because I'm apparently twelve. The rest of the building was definitely trial and error, a veritable melange of paint-mixing and hot glue frenzies. I even made a few little cardboard trees to go on the "mantle" or "Fantle," as it were. I will be adding some more inexpensive garb to the fireplace as the weeks go by, so stay tuned!

If you're interested in trying out your own fireplace masterpiece (I imagine your kids will love you for it!), there are a lot of great tutorials on Youtube. I found this one especially helpful.

Happy Fireplace-ing! 

Linking up to "A Round Tuit" and Totally Terrific Tuesday for the first time!

Monday, January 12, 2015

String-Wrapped Wall Art

It's pretty crazy what some string and canvas can do when their forces are combined. Our bare walls needed a little color but not at the cost of (insert something crazy expensive here).

This was a simple project I found on Pinterest that I thought would suit our simple nest nicely.


What You'll Need
- Canvas
- Spray Paint (color of your choosing)
- Scissors
- Tape or Glue

Directions

1. I like to begin by taping down the string to the frame as a starting point.
2. Start wrapping. I prefer to wrap randomly. Create patterns or don't. It's up to you. I personally turned on an episode of Friends (thanks, Netflix!) and just went for it. I found it easier to lay the spool of string on the floor and begin flipping the canvas itself. But, you may want to hold the canvas steady and wrap the string.
3. When you've got what you want, simply tie off the string on an existing string on the backside of the canvas. If you'd rather tape it down to the frame, feel free.
3. Once the wrapping is complete, lay your canvas down on tarp (or garbage bags) and spray away in your desired pattern. 
4. Allow to dry and voila!


Sunday, January 11, 2015

Tree String Art


For what seems like years, I've been living for the nail and string art I've seen all over Pinterest. So, I finally decided to go for it. Yes, there's some tedium involved. But, once you have the foundation laid down, this is a very mindless (and gratifying!) project that you can achieve in about an hour and a half to two hours all while watching the TV (in my case, "The Office").


What You'll Need
Wooden Wall Plank- like the one pictured below (I decided to spray paint mine in a darker wood spray paint but you could leave yours as is or stain as wanted)
Flat Head Nails- be sure that they are the right size according to the thickness of your plank (... that's what she said)
Hammer
Crochet String- you can also use embroidery string or any string that is to your desired thickness
Chalk


Use chalk to outline your tree or desired shape. I chose to do mine freehand to achieve a more homespun like. You can Google or Pinterest a number of templates if freehand is not your thing. Your cats will be undoubtedly interested in this entire process as evidenced by the photo above.


Begin hammering your nails along the chalk lines. The more nails you use, the more curvature you can achieve. Then, start stringing away! I chose to outline the entire tree first and then fill in. Do this as randomly as possible and pay attention to gaps once you are nearly finished. Wipe off the excess chalk with a wipe once you have completed your design!

Boom:

Sunday, January 4, 2015

Ping Pong Market Lights

Once upon a time, I found a post on Pinterest with a magical ladder in an even more magical leaning position against a wall strewn in market lights. I performed my usual croon and swore this would happen in our new place.

I like to go halfway on things.

1. I don't own market lights.
2. ... or a ladder.

This is where my improvisational skills come in handy.

While visiting my beautiful and talented friend Bry in NY, his sublet apartment had a (much more expensive than mine) mirror displayed on the wall in a delicious tilted, unattached manner. Aside from the fact I'm married, unattached, noncommittal behavior is MY JAM. So, I took our very plain mirror (pretty sure I acquired this at around eight bucks at Target) and revisited the Pinterest magic.

Ping Pong Balls + X-acto Knife + Half Off Christmas Lights at Wal-Mart on the day after Christmas= "Upscale" Home Decor.

What You'll Need
- Ping Pong, dare I say Table Tennis Balls (You can get a box of 140+ on Amazon for under $10)
-A String of LED Lights- make sure they are LED as non-LED's would be a safety hazard!! (Whatever color you prefer, white will give you more of a market light experience)
- X-acto Knife (These can be purchased at most craft stores; do not fear them, they are a very portable and useful!)


And yes, sometime the cat needs to inspect the packaging. It's for the safety of us all.
Steps
1. It's laughably simple. Using your knife, carve an "x" into each ball.
2. Insert the bulb of the lights.
3. Voila. No, really. You're finished. It was that easy. You're welcome.


Thursday, January 2, 2014

Pinteresting Around The House: Silverware Turned Jewelry Organizer.

I'm a believer in the idea that every new year should feel like a clean slate.

Granted, I tend to get a little clean-slate-happy regardless of what time of year it is. Perhaps it's every month. Or birthday. Or week. Or every third Wednesday of every other month. Or every Full Moon. Regardless, I love the feeling of starting anew (hence my avid obsession with rearranging the furniture; my poor husband never knows what to expect upon his arrival home after work).

Thusly, I have spent the last eight hours scouring our apartment; cleaning to the max, kids.

The reason you can know that this is on the border of excessive is that we live in a small one bedroom apartment. So, I was meticulous... to say the least.

I am, by no means, any sort of Mary Poppins, Martha Stewart, Betty Crocker, Sandra Lee, insert other females publicly recognized for their practical perfection in every other way. But, I do enjoy organizing.

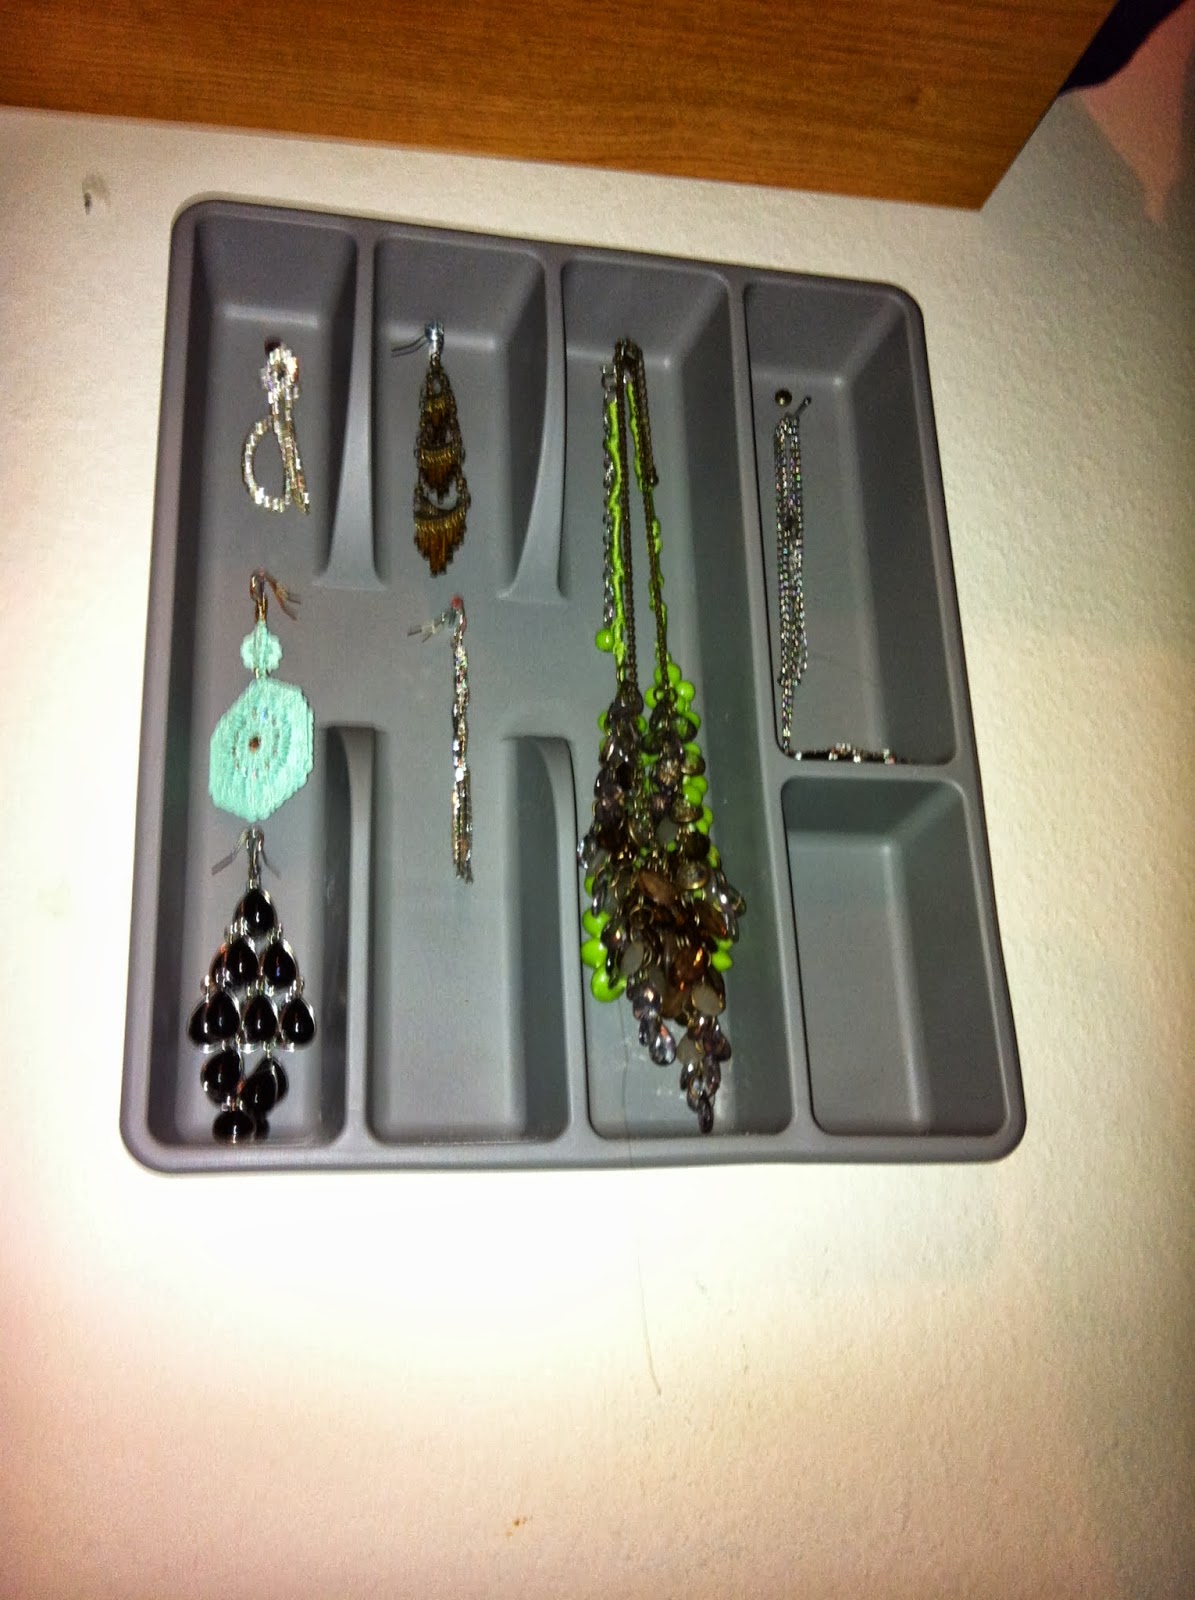
Today's little project? A Pinterest find from long ago: Silverware Organizer turned Jewelry McAwesome Organizer.

This was super de-duper easy, quick, cheap, and cute. All you'll need is a couple screws, a screw gun, a hammer, and however many nails to accommodate your jewelry needs. I screwed the silverware bin directly into the wall and began hammering in the nails from there. Easy as pie and a great easy-access way to keep up with your bling.


Monday, November 25, 2013

A Thrifty, Homespun Christmas: Easy Cinnamon Dough Ornaments


I've loved these since I was a kid. They're cheap, easy and make your home smell delicious!

What You'll Need
• 1 Cup of Cinnamon (Powder, not Cinnamon Sugar!)
• 3/4 Cup Applesauce
• 1 Tbs Ground Cloves
• 2 Tbs Elmer's Glue (I used Dollar Tree white glue)
• Cookie Cutter
• Straw
• String, Yarn, or Ribbon for Hanging

Directions
1. In a medium sized bowl, combine cinnamon and cloves.
2. Add the applesauce and glue.
3. Knead by hand in bowl for a few minutes, until you have a firm, pliable dough. If the dough is too wet, add more cinnamon if the dough is too wet, more applesauce if it's too dry.
4.  Dust your work surface with cinnamon.
5. Roll the dough to 1/4 inch thickness.
6. Cut into shapes with cookie cutters. 
7. While the dough is still moist, cut a hole in the top of each ornament with the end of a straw for hanging.
8. Place ornaments onto a cookie sheet (with no wax paper or tin foil and this could leave imprints on your dough during the drying process) and air dry for several days. Carefully flip them several times while drying so they won't bend or warp.
9. For a shorter drying process, bake ornaments at 200 degrees F for two hours, turning occasionally.

Sunday, November 24, 2013

A Thrifty, Homespun Christmas: Simple Yarn-Wrapped Holiday Wreath


Yarn-wrapped wreaths are one of my favorite crafts to do, especially during the holidays. They're easy to whip up while watching a Christmas flick and sipping cider. They're brainless, cheap and turn out lookin' super fancy and quirky. On Etsy or other specialty shops, these wreaths can range anywhere from $17- $50. But, you can make them yourself for just around eight bucks. Crafters will already have most of these items on hand.

What You'll Need
Foam Wreath (Got mine at Wal-Mart for $3.97)
Yarn (Had on hand; you can purchase at Wal-Mart for $2.40 and always keep your eyes peeled for sales!)
Holiday Accessories (Got mine at Dollar Tree for a buck!)
Tacky Glue
Hot Glue Gun and Glue (optional)
Scissors

Directions
1. Place a dot of glue at the top of your foam wreath.
2. Cut a manageable length of yarn (I like to wrap the yarn continuously around my hand until I have a large amount, cut, and begin from there).
3. Simply begin wrapping! I prefer applying a line of glue to ensure that the yarn stays in place. Wrap away, let your mind go wild with patterns and color combinations. Since I was using gold, glittery add-ons, I decided to keep my yarn simple and monochromatic.
4. Place your holiday add-ons where desired. For heavier add-ons, hot glue will work best when applying. For lighter add-ons, tacky glue will work fine. Let dry. Voila! 


Linking Up With:

Sunday, September 22, 2013

Easy Autumn Yarn Wreath


I've been wanting to make one of these wreaths since the invention of yarn.

This may or may not be an exaggeration.

And, by that I mean, I love a good hyperbole.

Pinterest is blanketed in wreath ideas. Especially, at this time of year. So, in honor of the FALL equinox (that's TODAY, folks!), I present you with my simple Autumn wreath. Perfect for any crafty, quirky, frugal front door like ours. :)


What You'll Need
- Yarn of your choosing (I bought the cheapest I could find at Wal-Mart- $2.22 per spool)
- One foam wreath ($3.00 at Wal-Mart)
- Felt (whatever colors you prefer- 5/$1 at Michael's or $0.29 per sheet)
- Tacky Glue

Directions
1. Place a dot of glue at the top of your foam wreath.
2. Cut a manageable length of yarn (I like to wrap the yarn continuously around my hand until I have a large amount, cut, and begin from there).
3. Simply begin wrapping! I prefer applying a line of glue to ensure that the yarn stays in place. Wrap away, let your mind go wild with patterns and color combinations. This is nice to do while watching a movie and sipping some cider. ;)
4. I cut my felt freehand into leaf shapes. Feel free to use a stencil if you'd like more precise shapes.
5. Apply leaves with tacky glue and allow to dry. Voila!

Linking Up With:

Saturday, August 3, 2013

Pinned It. Tried It: Milk Glass Rope Light Display


When I saw this pin a few months ago, I KNEW I had to give it a go. I had let the tops of our kitchen counters become a catch-all for leftover wedding decor. This was one of the easiest ways to classy up our little apartment kitchen. 


I watched this quick tutorial on creating your own "milk glass." Easy peasy! Grabbed our rope light and whaddya know?


Too Much Time On My Hands 


Wednesday, July 24, 2013

Our Wedding: Window Shutter Guest Book


I fell in love with the window shutters guestbook idea in the early months of planning our wedding. If fate wanted to have a hand, it surely did. One Saturday afternoon, we learned there was a yard sale happening next door to Timothy's folks' house. Low and behold, what shoudl we see but a closet door lying haphazardly on their lawn. "How much?" After a simple shrug, the neighbor responds, "A buck?" SOLD!

What you should know about me is that I'm a freebie whore. I use the term, "whore" lightly because you should also know that I am not a prostitute. To put it simply, I'm an avid advocate of signing up for samples online. You should try it. It's awesome. So, when I received a coupon for free paint at Ace Hardware, I immediately ran to our local store and grabbed our seafoamy little wedding color. And if that wasn't enough freeby-ing, I also order a bucket load of free customized Vistaprint cards in our wedding color for guests to write their messages upon.


This was a great, simple project for us to work on together and it looked beautiful at the reception. We had such a blast reading our sweet little notes the night of the wedding over chocolate-dipped strawberries in the hotel room. Perfecto.

Total cost of our guestbook? One dolla. Nailed it.

Tuesday, July 23, 2013

Framed Fabric


In an effort to keep our apartment as Pinterest worthy as possible, I had to give a shot at one of my favorite finds: framed art. I'd been storing this huge picture of a snow lion that I found propped aside a dumpster upwards of a year ago.

Now, as much as I enjoy a good feline, ain't no way a snow lion is going to find itself on the walls of the Candace-Timothy abode. But, the frame was too good to pass up. The frame sat in our closet pointlessly until my lightbulb moment of framing an old shower curtain of ours in it.


Who knew that fancy frames were such a tizzy to disassemble? That mess took me forever. I have to say I love the homespun, loosely imperfect look of the final product. I think I'll look into scrapbook paper next. Voila!

Friday, July 12, 2013

Cats Are People Too

About the only thing that saves me from the descriptor, "crazy cat lady" is that I have a husband, I brush my hair regularly, and I own less than twelve cats. However, judging the amount of cat decor around our apartment (mostly gifted to me which speaks volumes about what people think of me i.e. "that I'm a crazy cat lady"), you'd never know.

My mom gave me this AWESOME piece of art that she found at Goodwill. It looks like it's straight out of Urban Outfitters. It's totally us and I've had it for a couple of years now hanging up at the various apartments in which I've dwelled. I decided now in my 27th year of life and (stoopid) adulthood that I'd classy this little number up with a sophisticated coat of paint. Now, it says, "I'm an adult who understands the importance of ironic grandma art. Boom."

P.S. If cats are people too, how come Princess Baby Cat
doesn't understand that a paintbrush is not a toy?

Thursday, July 4, 2013

Keeping America Cute!

Well, glory be! It's birthday week! Amurrica always be crampin' my style this time of year. I'm all, "Oh hey everybody! My birthday is July 6th!" And Amurrica be all, "Oh yeah? Well, it's my birthday TODAY and I have WAY more friends and years on you. Do you get fireworks on your birthday? Nooooo. Do you get cookouts across the nation in celebration of your glory? Nope. Do people throw parades on your behalf and sing festive songs in your name? Nada. I win."

That's okay, America. How can I stay mad at you when there's THIS GUY?


Note: This is not my cat. I only terrorize our cats with costume torture during Halloween and Christmas. Also, yesterday. 

In other news, my ongoing quest for the perfect, tiny apartment continues. This week? A simple knob improvement. The unsightly old school doors to our laundry room sported an even more unsightly knob. Clearly untouched since 1985, these grungy old things were tarnished and splotched with careless paint stains. So, we grabbed these modern, sleek square knobs at Lowes.


The Damage: $2.97 per knob
Total Time To Replace Knobs: About five minutes. Boom.

Friday, June 28, 2013

Our Wedding: Rustic Burlap Jars (Craft)


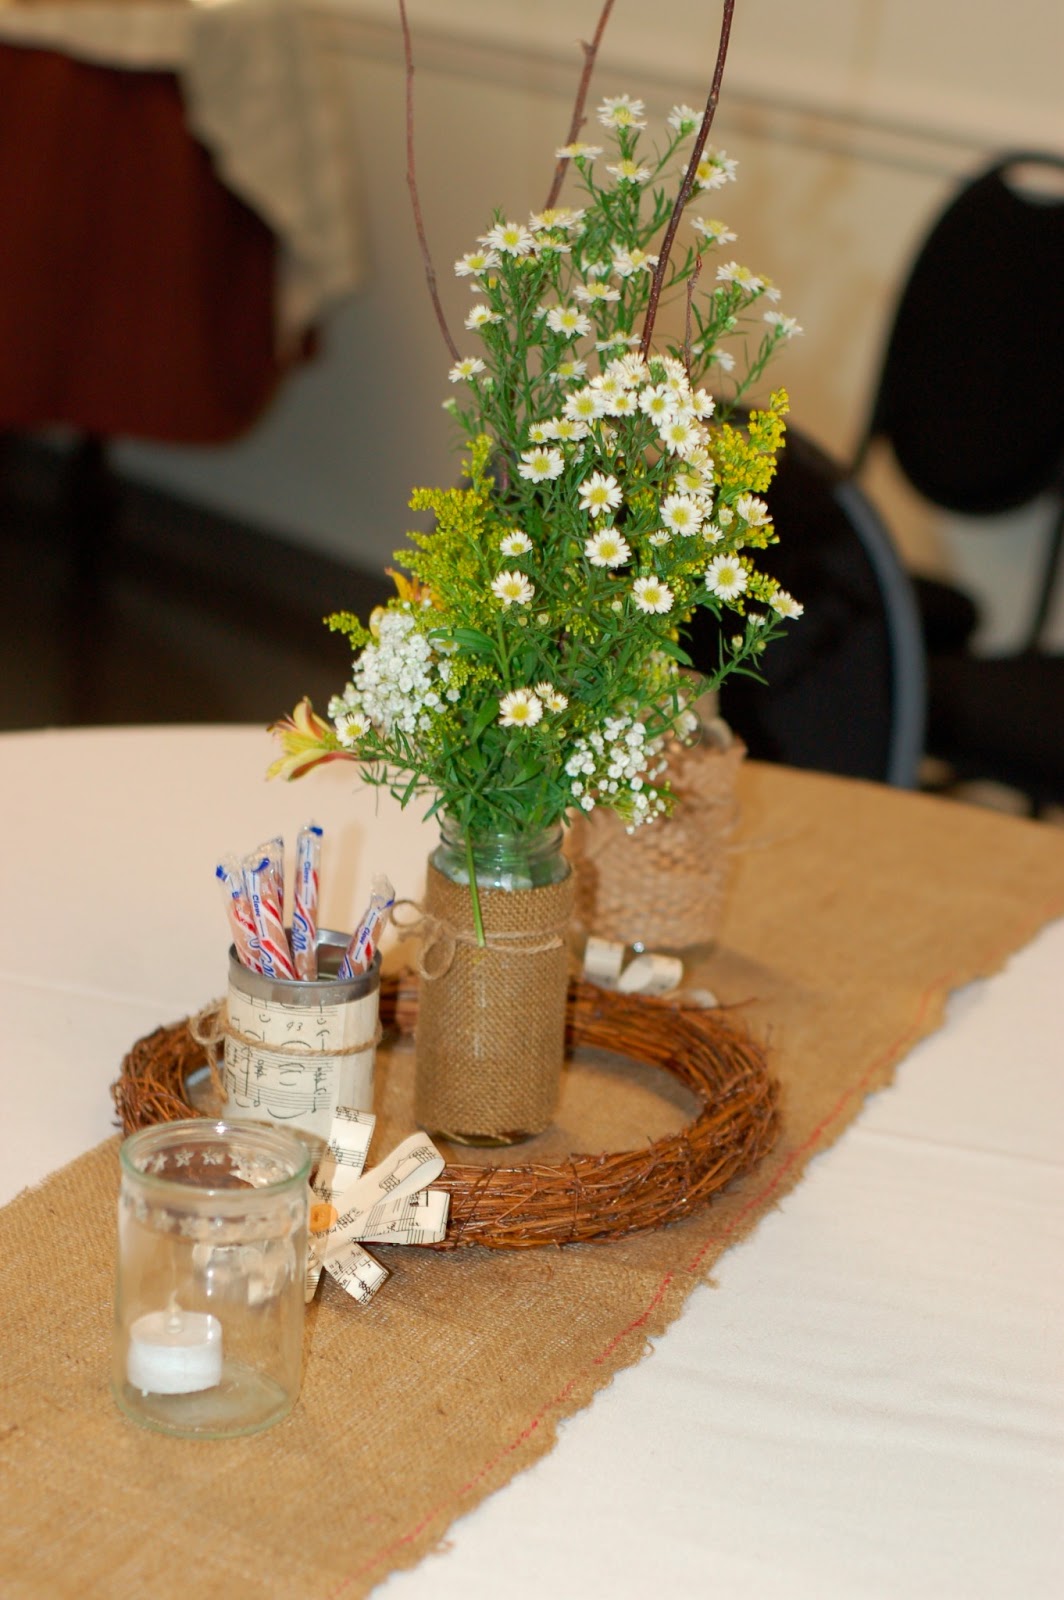
My dear sweet husband dealt with a year's worth of jar hoarding from me which is how I REALLY knew he was a keeper. :) Pickle jars, pasta sauce jars, salsa jars, and jelly jars made up the bulk of our wedding decor. Jars, glue, twine, and burlap: one of the simplest and cheapest ways to decorate your own wedding. I even added in some scrap trim that just happened to be one of our wedding colors and Disney World packing paper to the mix. Let your imagination go crazy!


Related Posts Plugin for WordPress, Blogger...